

Making 3d signs in multi colors!
- Thread starter Mark Janzen
- Start date
You are using an out of date browser. It may not display this or other websites correctly.
You should upgrade or use an alternative browser.
You should upgrade or use an alternative browser.

With FDM printing, integrating colors into complex shapes is a challenge. You can either design your parts to be printed in individual colors and then assembled (this is tricky when it comes to interlocking parts like a barber's pole) Or you can switch colors while printing the layer (which is very time consuming, and if you only have one extruder, it tends to waste a lot of filament)
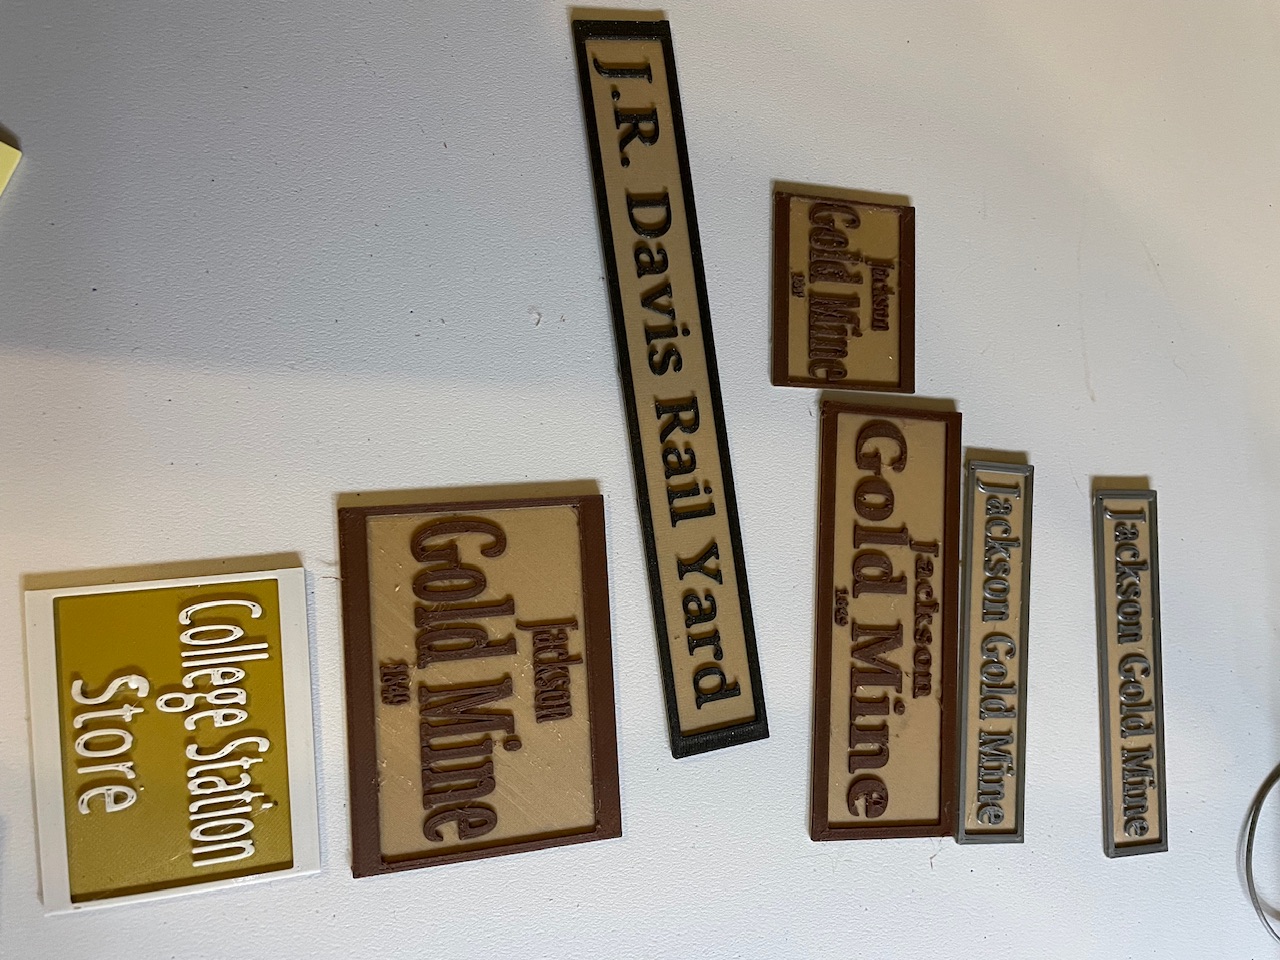
I'm not familiar with TinkerCAD and its toolset. I personally do this in my slicer. I use OrcaSlicer (which is a derivative of BambuSlicer, which is a derivative of PrusaSlicer) which has a paint mode where you can define which colors to use where. You can paint by a surface, by a layer height, sometimes constrained by the topology of the model. Is the picture you included stuff that you've printed, or something that you're trying to print?
I'm not familiar with TinkerCAD and its toolset. I personally do this in my slicer. I use OrcaSlicer (which is a derivative of BambuSlicer, which is a derivative of PrusaSlicer) which has a paint mode where you can define which colors to use where. You can paint by a surface, by a layer height, sometimes constrained by the topology of the model. Is the picture you included stuff that you've printed, or something that you're trying to print?
Thanks for the insight into "paint" slicers. I design in TinkerCad and use the PRUSA slicer to edit layer coloring and output BGCODE to my Prusa Mini+. The objects in the pic are several of the 80 signs, etc. I've printed for my G Scale backyard model railroad.With FDM printing, integrating colors into complex shapes is a challenge. You can either design your parts to be printed in individual colors and then assembled (this is tricky when it comes to interlocking parts like a barber's pole) Or you can switch colors while printing the layer (which is very time consuming, and if you only have one extruder, it tends to waste a lot of filament)
I'm not familiar with TinkerCAD and its toolset. I personally do this in my slicer. I use OrcaSlicer (which is a derivative of BambuSlicer, which is a derivative of PrusaSlicer) which has a paint mode where you can define which colors to use where. You can paint by a surface, by a layer height, sometimes constrained by the topology of the model. Is the picture you included stuff that you've printed, or something that you're trying to print?
I wish I had printer with multiple heads!! It’s time consuming to switch filaments colors! But my painting is terrible. I’ve be told to try ink rollers and will give it a try.
Ink rollers? I did not know that they where also in small size.I wish I had printer with multiple heads!! It’s time consuming to switch filaments colors! But my painting is terrible. I’ve be told to try ink rollers and will give it a try.
I used sometimes dish cleaning sponges.

Multy schoonmaaksponzen - Multicolor - Foam - Set van 20 Stuks - Schoonmaken -... | bol
Multy schoonmaaksponzen - Multicolor - Foam - Set van 20 Stuks - Schoonmaken - Schuurspons - Schoonmaakspons - Spons. Geef je huis een krachtige...
 www.bol.com
you can cut one into .300x.300(1x1cm) and "stamp" with it.
GAP
G Scale Trains, HO Trains, 1:1 Sugar Cane trains

The small foam brushes at home depot will paint the lettering tops perfectly in 1-2 passes.I’m a newbie and using Tinkercad to create multi color building, etc. signs by changing filament colors at different layers for lettering and boarders. Can’t figure out how to incorporate graphics like a barber pole or ?. Any ideas on how?
-
 2
2
- Show all